HEADS UP - Some links on Breeze Around The World are affiliate links. This means if you choose to make a purchase through one of the links I provided, I may earn a small commission at no extra cost to you. These earning help me keep the blog going, thank you for your support!
When I hiked the Heaphy track in September, it became the 5th great walk I had done in New Zealand! I found Heaphy to be totally unique and unlike the other walks in many ways.
Not only is the Heaphy Track incredibly isolated (you’re walking through the middle of a remote national park) it offers different biomes each day of the 4-5 day walk.
If you’re planning on tackling the well maintained, 78km track, I’ve got you covered in this guide to the Heaphy Track, which is based on my own hiking experience! Stick around until the very end because I had a CRAZY experience during my tramp that I’ll share in the last section of the guide!
If you don’t have time to read the whole post, you can also jump around using the table of contents
Where is the Heaphy Track?

The Heaphy track is a 48 mile “point to point” trail located in Kahurangi National Park, New Zealand’s second largest National Park. The highest point on the track, Flannageans Corner, will get you up to 3,000ft and offers stunning views of the surrounding mount range.
Heaphy is tucked up in the Northwest corner of the South Island. Honestly you’ll find transportation to and from the track the trickiest part!
This certainly is a remote and beautiful area. You’ll go through alpine herbfields, walk through subtropical forest, along rivers and through dense evergreen forest during your 78km (48 mile) walk.
When To Hike the Heaphy Track

It’s important to know that the official great walk season as dubbed by New Zealand’s department of conservation (DOC) is from October – April. AKA summer time! This is likely when you’ll want to plan your walk.
The Heaphy Track is partially on the west coast, which can be hammered by rain, wind, snow and fog year round. If you’re planning on hiking outside the great walk season (like we did) just know you need to be prepared for more uncomfortable conditions.
We hiked the Heaphy Track at the end of September, and even though that’s spring time here in New Zealand, we still got hammered by an intense rainstorm on our 3rd day of the walk! More on our experience later.
How to Hike the Heaphy Track
How to hike the Heaphy Track… AKA what route should you follow and how should you break up your milage per day?
There are 10 huts and campsites located across the 48 mile track. For this reason you can easily customize your distances each day, but there is a standard route most people follow.
You can either start in the north coming from the Brown Hut carpark (nearest large town is Nelson) or start down on the west coast at the Kohaihai carpark (nearest large town is Westport).
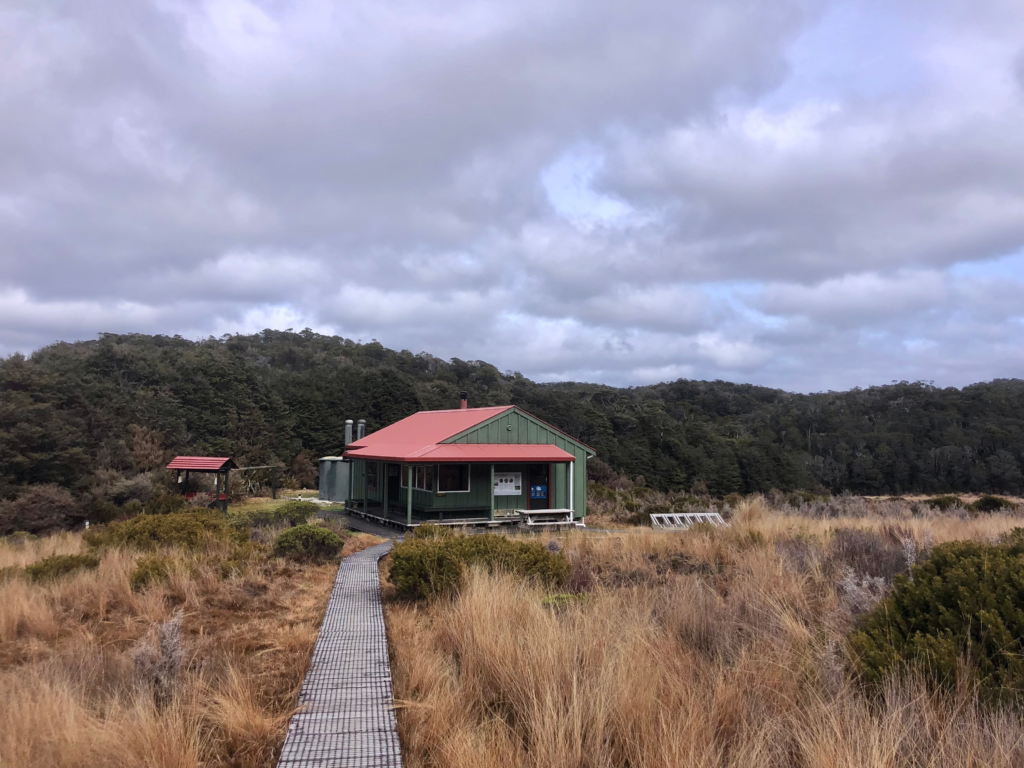
The main huts people stay in are Perry Saddle, James Mackay and Heaphy Hut. These are the biggest and most modern huts along the track and book out far in advance. I’ll be covering how to book a great walk later in the guide.
Hike Heaphy in 4 Days (itinerary)

Here’s a sample hiking itinerary hiking north to south based on the most popular huts:
Day 1: Brown Hut carpark to Perry Saddle Hut – 10.8 miles, 2300 ft elevation gain
Day 2: Perry Saddle Hut to James Mackay Hut – 15 miles, 500 ft elevation loss
Day 3: James Mackay to Heaphy Hut – 12.7 miles, 2300 ft elevation loss
Day 4: Heaphy Hut to Kohaihai carpark – 10 miles, 0 ft
If you wanted to take 5 days to do the walk, you could add in Saxton Hut in between Perry and James Mackay, splitting up the 15 mile day into two more manageable 7 mile days.
Honestly even though you’ll be climbing up to 3,000 feet, the elevation gain on day 1 is spread out over a manageable 10 miles. So while YES you will be going UP, it doesn’t feel too punishing… until the last 3 miles that is hahaa!
Where to Stay Before Hiking Heaphy

Like I said, the Heaphy Track is OUT THERE. So you’ll likely need to stay in one of the nearby small towns the night before your hike. This coupled with the transportation costs make Heaphy a more expensive great walk.
On the northern end in the Tasman District (the Brown Hut carpark side) I recommend staying in Takaka or Motueka. These are both smaller towns but closer to the start of the track, so you can get an early start on day 1.
On the west coast you’ll be near the small town of Karama or the slightly larger Westport.
I haven’t personally stayed in any of these towns so I don’t want to recommend anything specific! But you can browse your options on booking.com to see prices, reviews and photos of all your accommodation options.
Transportation to the Heaphy Track
I won’t lie, the transportation logistics for Heaphy are a nightmare!
Heaphy is not a looped track and you will end up about 250 road miles away from where you started!
Here are your options for getting between the two start/ end points of the track.
Car Swap: While this seems a little daunting at first, there are a ton of like minded and amazing hikers on the track with you. Many of whom are happy to swap car keys with you and drive your car (while you drive theirs) back to a meeting spot. There are facebook groups to help coordinate tramping groups. This is what we tried to do but unfortunately we couldn’t find people hiking the same days we were due to hiking in the off season.
Shuttle Bus: The good news is there are a few shuttle services around the area that offer direct pick ups! The bad news is they only operate during the Great Walk season (Oct – May) and they cost up to $250 NZD ($145 USD).
This is a great option if you’re moving on to a new city after the track. But if you’re coming back up to get a car or to stay in Nelson a bit longer, you’ll be on the shuttle for roughly 6 hours to get back where you started!
Check out The Heaphy Bus or Trek Express to see if their services fit your plans!
Fly with Golden Bay Air: The least economical but also the coolest option… you can fly back to the start with Golden Bay Air! There’s a few travel logistics hidden here. You’ll leave your car at the Takaka airport (if you start from the Brown Hut end) and take a shuttle to the start of the track. Then from Kohaihai carpark you’ll take another shuttle to the Karamea airport and then fly back to Takaka. The whole thing will cost about $400 NZD ($233 USD). But you get a pretty cool scenic flight there.
Car Relocation Service: If you have a car and you want the convenience of having it waiting for you at the end of your hike, you can opt to get your car relocated to your end point. This will cost anywhere from $455 to $515 NZD ($265 – $300 USD). Check out ‘Heaphy Track Help‘ for their services and transfer options.
Hike it as an out and back: If you’ve got a car and you don’t want to spend hundreds of dollars on logistics, you can always do what we did and hike this as an out and back track. We hiked a bit past the midway point and then turned around and came back to our car at Brown Hut Carpark. We also met a couple that was hiking all the way to Kohaihai and back to their car! Making Heaphy a 100 mile tramp!
We have plans to go back later in the year and hike from the Karamea side to see what we missed along the west coast!
Huts VS. Camping
The Heaphy Track has 10 spots to sleep along the trail. There are 6 huts which also have campsites near. In addition to these hut/campsite locations there are 4 additional campsite only areas.
These 10 spots for sleeping are spaced evenly throughout the trail, so even though Perry, James Mackay and Heaphy are the 3 most popular, you really can customize the track to hike at a pace suitable for you!
You can opt to stay in a hut which lets you pack less but you have to sleep next to a stranger, or you can bring your own tent, carry the extra weight and save some money.
If you’ve never stayed in a hut….
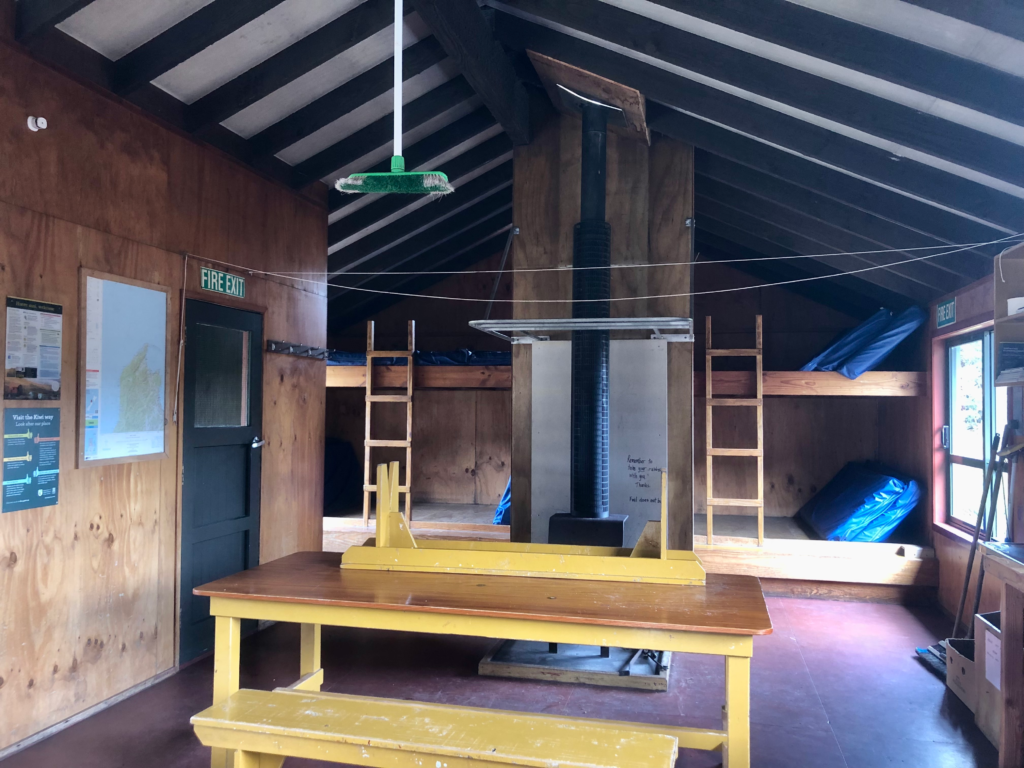
If you’ve never stayed in a hut (I certainly hadn’t before New Zealand) here’s what to expect. They have gas to cook on, a wood burning stove, “running water,” toilets (maybe pack TP just in case), mattresses and sometimes even a deck of cards!
While they do have mattress, you supply the sleeping bag and pillow! This is not an all inclusive experience. I’ve heard tales of people thinking that because they booked everything through the DOC that things would be set up for them at the huts, this is not the case! Remember you are tramping, the hut is just a fancy tent.
As for drinking water, all the huts had a rainwater catchment system which they advise you to purify in some way. Either by boiling, filtering or using tablets. To save on fuel we have a Sawyer filter which conveniently screws on to most plastic water bottles.
I’d never stayed in a hut until coming to New Zealand and I didn’t realize that you sorta have to sleep right next to strangers. Nightmarish for some of us. And of course there’s other peoples night time behaviors like getting up to use the restroom, rustling and of course snoring. My partner Nate always brings silicone ear plugs.
How to Book the Heaphy Track

Now that you have your game plan of which direction you’ll hike, how to get there, which huts to sleep at and how far you’ll be walking each day, it’s time to book everything!
You must book in advance through the DOC booking website. During the great walk season huts are $66 NZD for international visitors (that’s $38 USD) and campsites are $28 NZD intl ($16 USD). The fees are slightly lower for NZ residents and certain visa holders.
How to Prepare for a Great Walk

I love to plan out my trips to make sure I have a safe and successful time! This is my little checklist to make sure you’re ready to hike the Heaphy Track.
This isn’t a list of things to pack but rather a to-do list before the hike and some loose packing guidelines
- Dates picked out
- Huts/campsites booked for the correct direction
- A place to stay before/after
- Transportation sorted
- Food packed (see food inspiration in the next section!)
- A way to make clean water
- Personal equipment
- Sleeping bag / pillow
- Hiking outfit / sleeping outfit
- A GOOD pair of hiking socks (truly essential!)
- MEDICAL KIT
- Sun protection!
- Rain gear
- Intentions registered
Backpacking Food Inspiration
Making a delicious backpacking meal has become a bit of a hobby for me recently.
I aim to pack lightweight, high protein and yummy meals! I eat a vegetarian diet but my partner Nate is an omnivore, so you’ll see a wide range of food inspiration in the table below!
For more backpacking food inspiration head over to my “cold soak lunches” blog post!
| Breakfast | Lunch | Dinner | Snacks |
| At home | Curry Noodles | Chilli Pasta | OSM bar / Dried mango |
| PB Protein Oats | Dal Tadka | Pesto Lentils (beef bolognese for Nate) | OSM barTrail Mix |
| PB Protein Oats | Burrito Bowl | Pad Se Ew | OSM barTrail mix / mango |
| PB Protein Oats | Ramen + Tuna | At home | OSM bar |
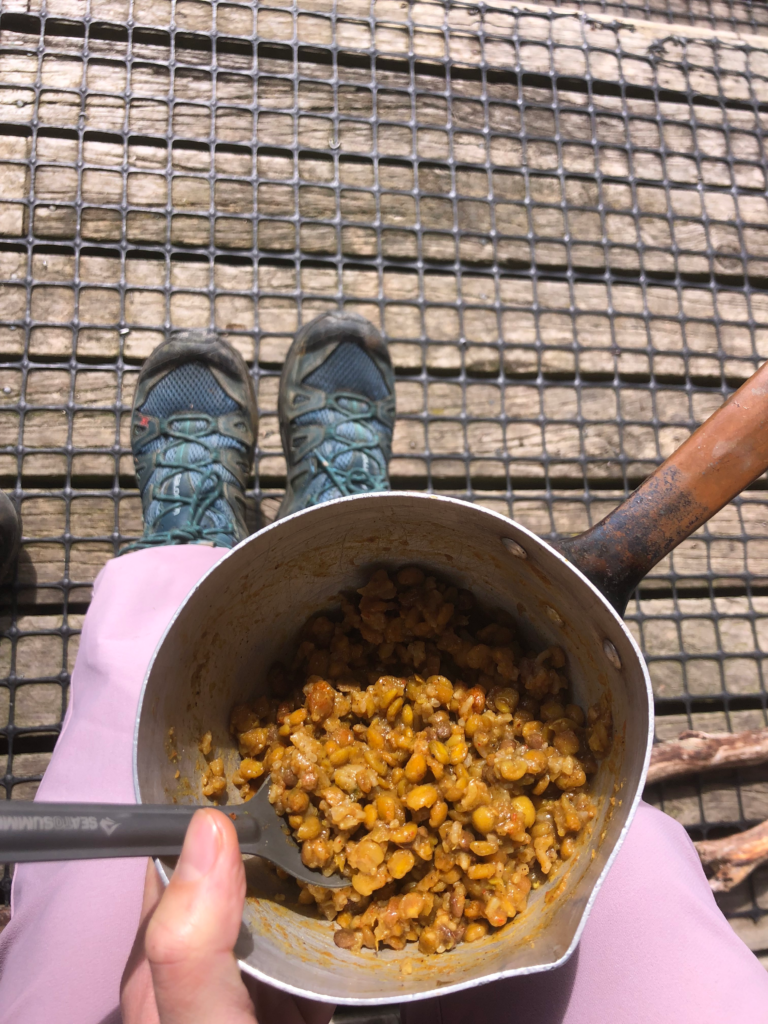
We ate our classic protein oats (1 cup dry oats, protein powder, cranberries, cinnamon) and added peanut butter this time! Boy oh boy did it make this breakfast so much better!
As for the other meals, we actually dehydrated them ourselves! Unfortunately this is probably not an option if you don’t have access to an oven in New Zealand. Many of these meals were inspired by store purchased dehydrated meals (i.e ‘backcountry essentials’) or meals we already make at home.
Even before we discovered dehydrating in our oven we found the store bought backpacking meals to be expensive and not worth it. We would often make our own lightweight “just add water” meals by packing ramen, instant mashed potatoes, tuna, couscous and ‘San Remo’ mac and cheese. We wouldn’t mix all that together of course, but you get the vision.
Cutting out excess packaging also helped us keep the weight down, which allows us to bring extra food for those just in case moments!
Cost of Hiking the Heaphy Track

So what’s the total cost of hiking this beautiful and well maintained 48 mile track? Here’s a total budget breakdown for our 4 day tramp…
We hiked the track during the off season which saved us about $20 NZD / $12 USD per night. We also hiked back to our car to save on the cost of transportation. For the purpose of the budget breakdown I’ve used the ON SEASON price per hut since that is when most people choose to hike Heaphy.
Huts
3 nights: $198 NZD / $120 USD
Transportation
Gas to drive from Nelson: $75 NZD / $43 USD
Parking: Free
Food
Dehydrating meals at home: $30 (ish) NZD / $18 USD
Safety
Registering our intentions: free
The total cost of hiking the Heaphy track in 4 days was $303 NZD or $181 USD per person. About $75 nzd per day!
This will of course vary greatly depending on your transportation logistics!
What’s It Like to Hike the Heaphy Track?

So what is it actually like to hike the Heaphy track? Here’s my Heaphy track review including a day by day breakdown!
We hiked the track as an out and back to save ourselves the headache of transportation logistics. And we were so bummed out to miss the second half that we have plans to go back and finish in a few months!
Each day of the Heaphy Track is unique and takes you through a different type of terrain. You’ll start in an evergreen forest on day 1, pop up onto the grassy highlands on day 2, through a subtropical rainforest day 3 and end by the beaches and rivers of New Zealand’s west coast.
We just so happened to hike during a massive rainstorm and had an insane adventure on day 3! Here’s a little about our hike and the day by day breakdown.
Day 1: Brown Hut Carpark → Perry Saddle Hut , 10.8 miles

We got a late start to day 1 due to having to drive in from Nelson! But we hit the trail with a lot of gusto and excitement! The trail on day 1 starts at a pretty gradual incline but eventually you really start to feel it!
The last 5km (3.2 miles) felt like foreverrrr! You’re in the woods the whole day, so the end can feel like a bit of a slog. Especially for us because we were fighting for daylight due to our late start. But we made it to the hut in just over 4 hours!
The craziest part was we only saw 3 other ladies on mountain bikes the whole day! It was just the 5 of us in the hut that night. Off season perks!
Day 2: Perry Saddle Hut → Saxton Hut (and beyond) , 12 miles


Finally I could see why the Heaphy Track was special. Not going to lie, since day 1 was entirely in the woods, I found the track to be like any other hiking track. But day 2 is where the magic is!
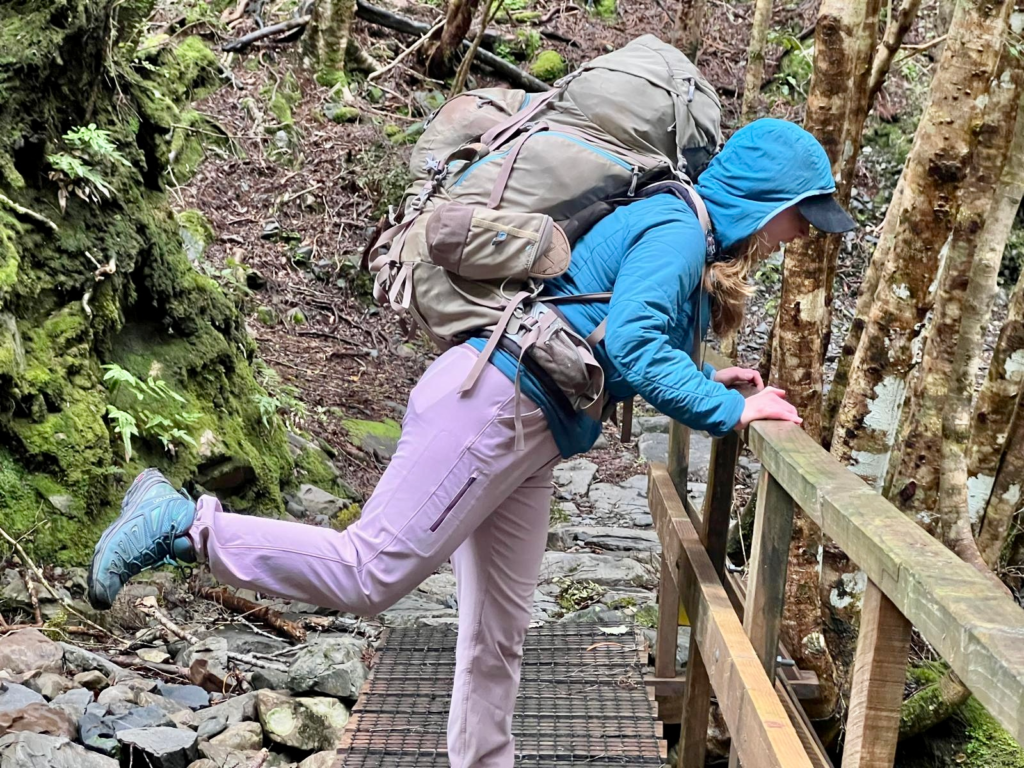
You’ll pop out of the woods and navigate beautiful tussock grasslands, cross rivers (over bridges) and get sweeping views of the neighboring mountains.
Along the way to Saxton hut we checked out the quaint Gouland Downs hut, which has some cool old farming equipment on the grounds. You’ll also walk by the many gouland downs caves!
It’s about 3 hours to get to Saxton hut, which many people stop at for lunch before continuing on to Perry Saddle Hut. For us however, Saxton was the final destination. We had done about 7 miles and wanted to go a bit further, so we dropped out packs and set out on a little afternoon hike!
We saw 2 takahe (the previously thought to be extinct New Zealand ground bird) hanging around the hut! What a treat!
We hiked a few miles further until we could see the ocean! We also passed the bench that separates the “Tasman” district from the “West Coast” district. Which was a pretty cool landmark to see!
Day 3: Saxton Hut → Almost to the carpark → back up to Perry , 22 miles

Get ready for a bit of a saga.
We started day three early in the rain, as we knew it would be raining all day and steadily get worse! We made it to Perry Saddle Hut for lunch around 11:30am.
We debated staying at Perry for the night, but we knew the rain would only get worse. For us the safer decision was to hike all the way down to the Brown Hut carpark in case the trail became to flooded to hike safely the next day.
On our way down from Perry Saddle we met a mom and son who were hiking up the the hut. They gave us some chocolate bars to pass along to the rest of the family – a dad and younger son.
WELL, it was an hour and 3 miles later before we found them warming up in the emergency shelter! The son had gotten too wet and cold to keep walking and the dad had to carry him about ¾ mile up to the shelter.
We stayed with them and made them hot coco, gave them our space blanket and made sure the kid was in warm, dry clothes. My partner Nate even hiked back down the hill to retrieve the dads backpack he had left on the side of the trail.
The father and son assured us they would not spend the night in the shelter and would finish the 1 hour hike up to the hut where the rest of their family was. We bid them ado and I even gave the kid my hat to keep warm.
This is a TOP TIP for ANYONE backpacking. EVERYONE should have their own emergency gear and wet clothes will be the end of you! Make sure you always have enough warm dry layers.
We continued to hike down the hill for the next 2 hours, crossing increasingly higher streams. Until, about 4 miles from the carpark, we came across an uncrossable river.
There was just no way around it, setting foot in that river would have caused us to be swept away. It was truly terrifying to even think about crossing.
We had to turn around at 4pm and hike back up to Perry Hut, it was the only safe option. Thus, we started the 6 mile incline.
After 2 hours of hiking we came upon the emergency shelter, that meant we just had 1 hr left to the hut! We stopped to get our headlamps out and were SHOCKED to see the father and son still there, all cozy in the shelter.
They had made up their minds to spend the night there and we were to deliver the message that they were okay to the rest of the family. We were pretty surprised they didn’t want to push that last bit up to the hut but we promised to deliver the message.
We even gave them our portable stove to make a hot meal, as they didn’t have one of their own.
Finally, just before 7pm in the pouring rain, we made it back up to Perry Hut safe and sound!! We were cold and hungry but elated! We ended up spending over 10 hours hiking and covered 22 miles due to having to turn around. While it was devastating to turn around just a few miles from the car, we knew it was the safest thing to do and we were proud of our decision.
Day 4: Perry Saddle Hut → Carpark , 10.8 miles

The next morning was dry and sunny! We were eager to get hiking and I was excited to see how small the streams were that caused us so much grief the day prior.
Streams that were knee deep the day before were now crossable without even getting our feet wet! And the big river that caused us to turn around had shrunken significantly! We estimated it was over waist deep the day before! I am so thankful we used our backcountry common sense and didn’t try to cross it.
Oh and we of course saw the dad and son the next day, they were all good! Which was a relief!
We finally made it to the car feeling so accomplished. Especially because we had done 55 miles in the last 4 days!

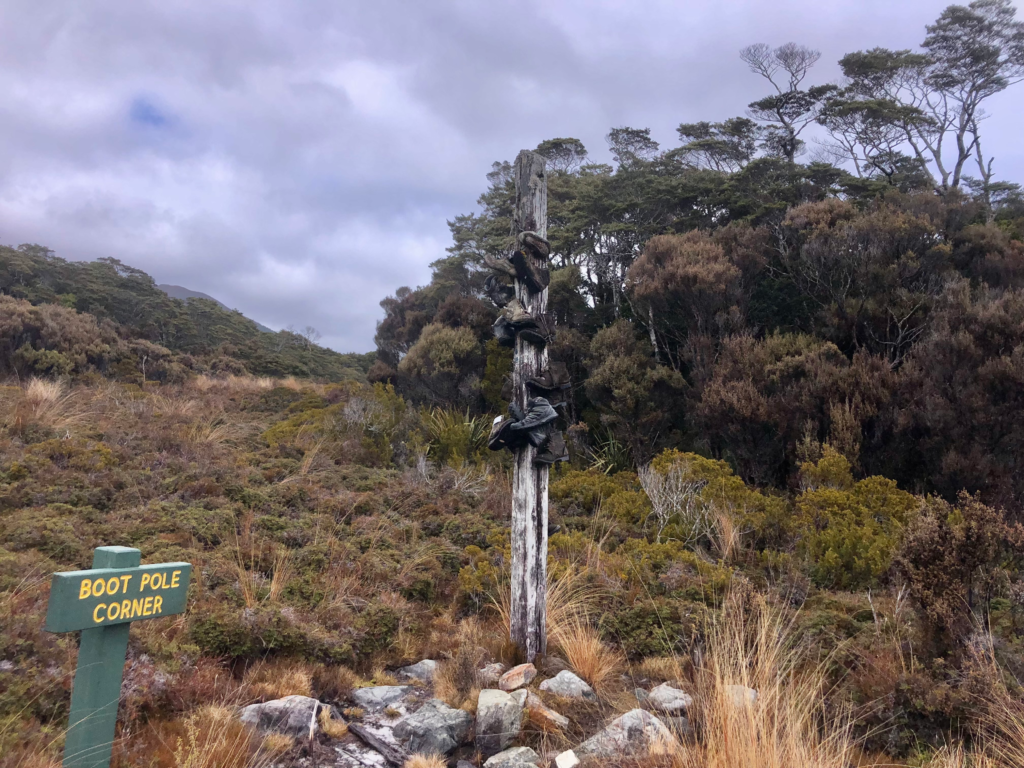
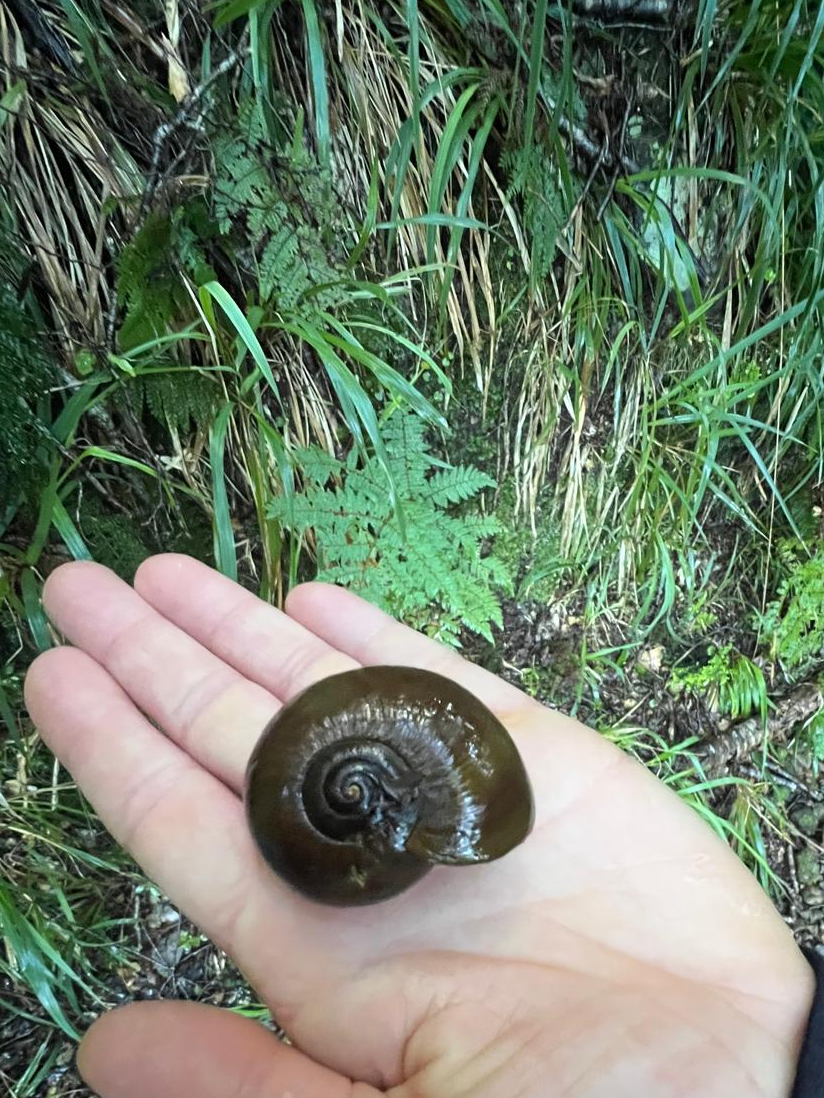
So there you have it! I hope you feel prepared to tackle this beautifully well maintained 78km trail! This is a wonderful trail, from the wild takahe to bootpole corner to the grassy highlands, you’ll be taking in amazing scenery the whole time!
I hope you found this guide to the Heaphy track helpful, happy trails!

Ahoy! I’m Bree and I’ve started this blog to help you plan your next great outdoor adventure. With a background in marine science, I’ve got an aptitude for all things ocean, but you’ll find land based adventures here too! Everything you see here is based on my own travel experience and paid for myself. I hope you stick around!