HEADS UP - Some links on Breeze Around The World are affiliate links. This means if you choose to make a purchase through one of the links I provided, I may earn a small commission at no extra cost to you. These earning help me keep the blog going, thank you for your support!
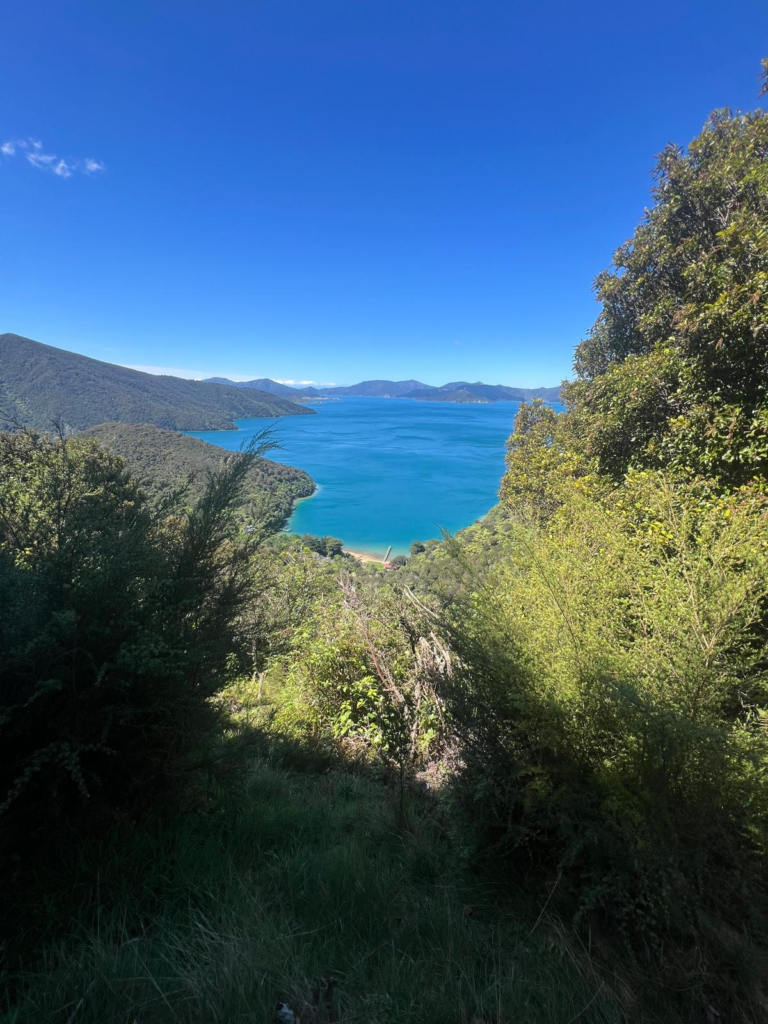
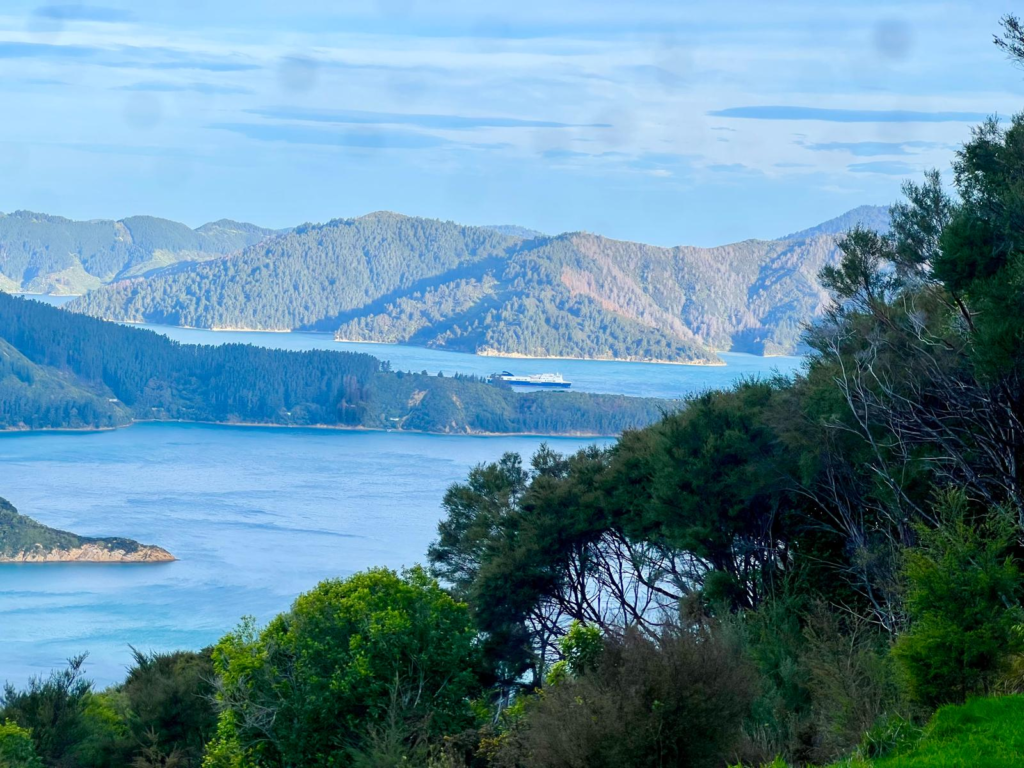
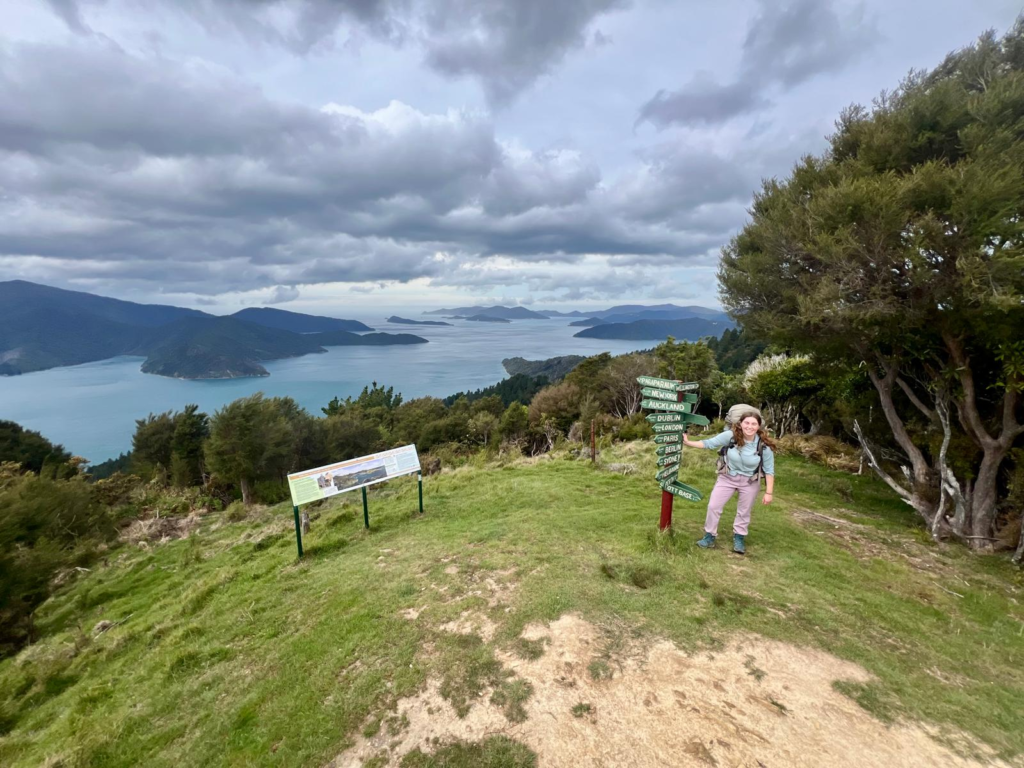
The Queen Charlotte track is located at the tippity top of the south island of New Zealand. This 72km track (that’s 48 miles for all us Americans) boasts incredible beaches with clear water, lush forests and stunning ridge-line views of the Marlborough sounds.
This track was recommend to me over and over and over again. After spending 4 days on the track I can see why! I’ve put together the ultimate guide to hiking the Queen Charlotte track in 4 days!
The scenery was amazing, the track was pretty well maintained and you don’t even have to sleep in a tent if you don’t want to! If you want a multi-day hike here in New Zealand but you don’t have all the camping gear, the Queen Charlotte track hike has lodging accommodations along the way.
Of course I did it the uncomfortable way and slept on the ground…. hahaa
Regardless of if you choose to camp or lodge, the track will surely be memorable! This ultimate guide to the Queen Charlotte track in 4 days has everything from where the track is, accommodation before and after and our exact route!
Where is the Queen Charlotte Track
The Queen Charlotte track or QCT is located at the top of the South Island, near the quaint town of Picton. Picton is relatively accessible as it is the gateway between the north and south island. If you’re coming from the south island it’s just a 4 hour drive from Christchurch!
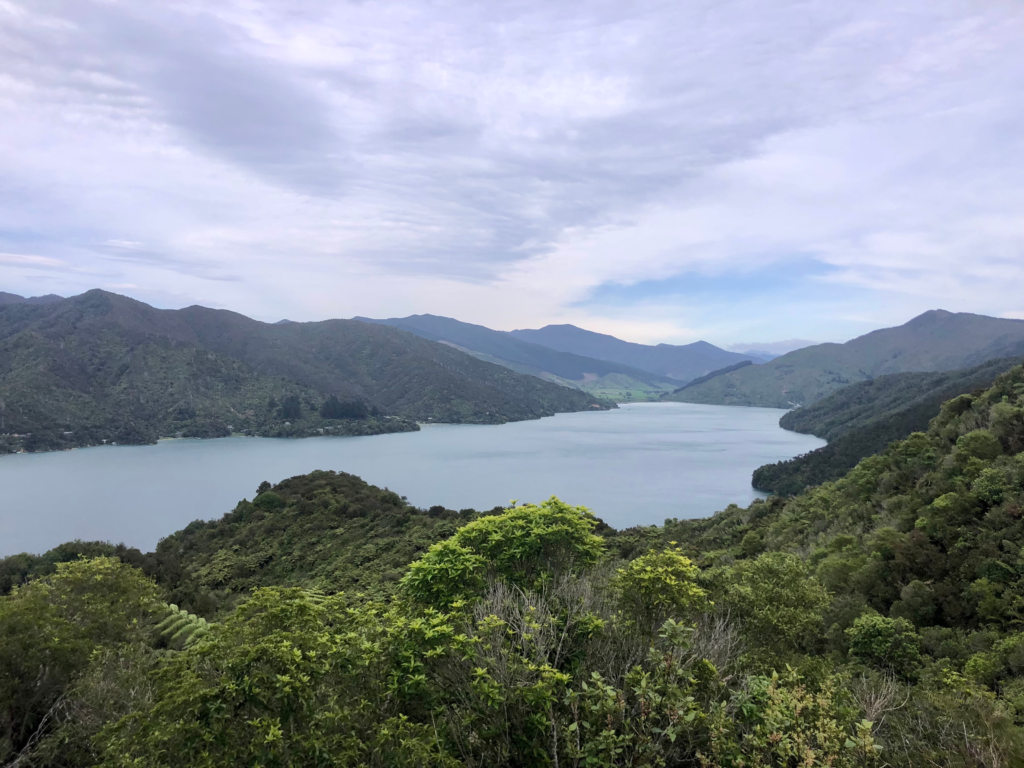
The track itself follow the coast and ridgeline of one of the “arms” of the Marlborough Sound. It’s like walking along a mini peninsula! So while the QCT is essentially based out of Picton, you will need to take a water taxi out to start the track.
To access the track by foot without utilizing the water taxi, you would actually have to drive to the town of Anakiwa, which is roughly 1.5 hrs from Picton. However as you’ll see in the transportation section of this guide, the most popular option is to take a water taxi out to the very end and hike back.
When to Hike the Queen Charlotte Track
The weather on the QCT is mild enough that it could be hiked any time of year… especially if you’re not camping!
With that being said the climate at the top of the South Island is supposed to be a dry and sunny one, but this 2025 winter was one of the wettest years on record! For the best weather, plan to hike between October – April!
The most popular time to hike will be in the height of summer, Dec-Feb. So if you want to avoid the crowds, hike in the shoulder season.
We did the hike at the end of October and had 1 beautiful day of sun, 2 cloud days and 1 rainy day. We hardly saw anyone on the trail!
Where to Stay Before / After
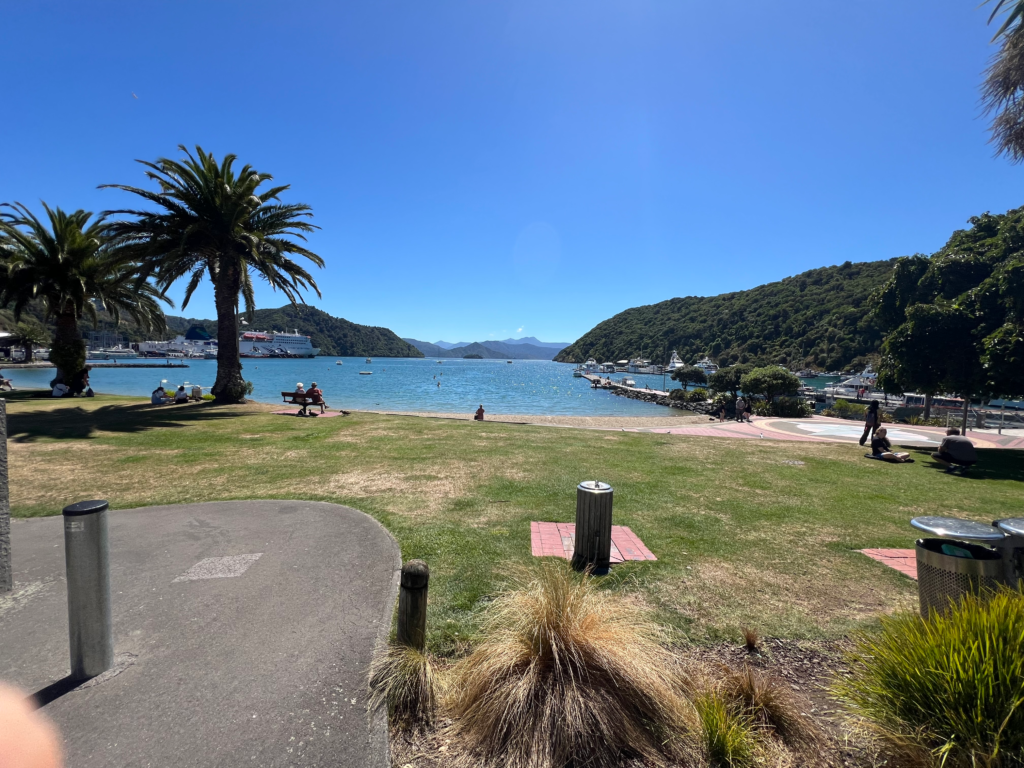
You’ll likely choose to stay in Picton before and after your hike as it’s the main hub for the QCT! In terms of accommodation we’ve done it all in Picton: camping, airbnb, hostels and hotels!
You’ll probably be pretty over the whole camping thing, so here’s my favorite hostel and hotel in town…
The Villa Hostel – Cute, colorful, quirky! Located right downtown this charming hostel was clean and created a friendly atmosphere for travelers to mingle!
Bay Vista Waterfront Motel – With stunning views and apartment style accommodation this is a great choice for your pre or post hike digs! It’s walkable AND offers free parking!
➡️ Click Here for Rates and Booking Info ⬅️
Transportation: Queen Charlotte Track Water Taxi
For all intents and purposes, the Queen Charlotte Track starts in Picton.
As I mentioned, Picton is a pretty accessible small town because it serves as the gateway between the two islands! If you have a rental car, driving there is pretty easy! If you’re taking busses throughout the country, the InterCity Bus connects Picton to a number of other NZ towns and cities!
To get to the start of the track at Ship Cove, you’ll need to take a water taxi booked in advance!
There are a few outfitters but we went with Beachcomber Cruises. They offer a roundtrip pass for $129 NZD per adult.
The water taxi leaves at 8am or 9am (depending on what you booked) and is about a 1 hr ride out to Ship Cove! The way back from Anakiwa is a short 30 minutes! We even saw dolphins both times!
If you choose to stay at the lodges, Beachcomber Cruises will even transfer your pack each day, so you just have to carry a day pack.
How to Hike the Queen Charlotte Track – 4 Day Itinerary
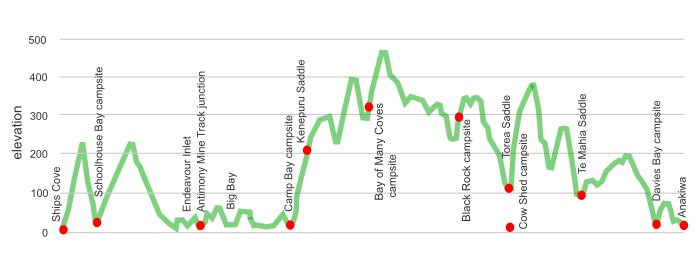
Here’s how we ended up hiking the track in just 4 days! Note that you can hike either direction, but Ships Cove –> Anakiwa is by far the most popular.
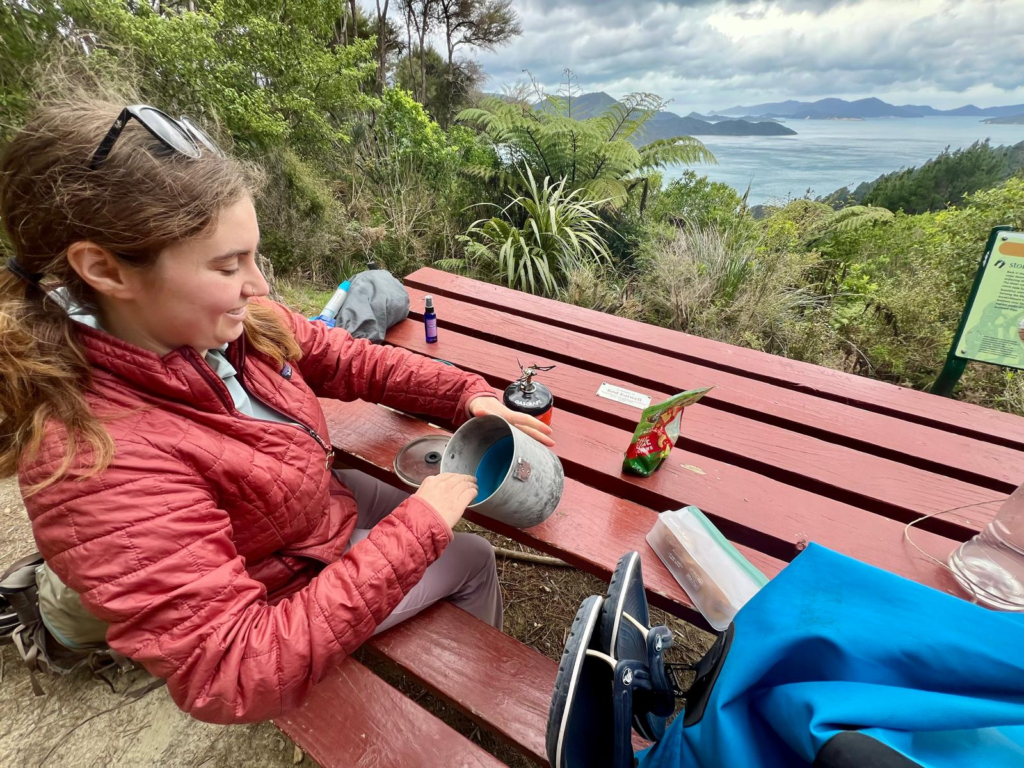
Day 1: Ship Cove to Endeavor Inlet – 12 miles, 1300 ft elevation gain
Day 2: Endeavor Inlet to Bay of Many Coves – 12 miles, 2500 ft elevation gain
Day 3: Bay of Many Coves to Te Mahia – 18 miles, 2750 ft elevation gain
Day 4: Te Mahia to Anakiwa – 7 miles, 200 ft elevation gain
If you add up that milage you’ll see it was 49 miles, we did a few side trails to some scenic viewpoints.
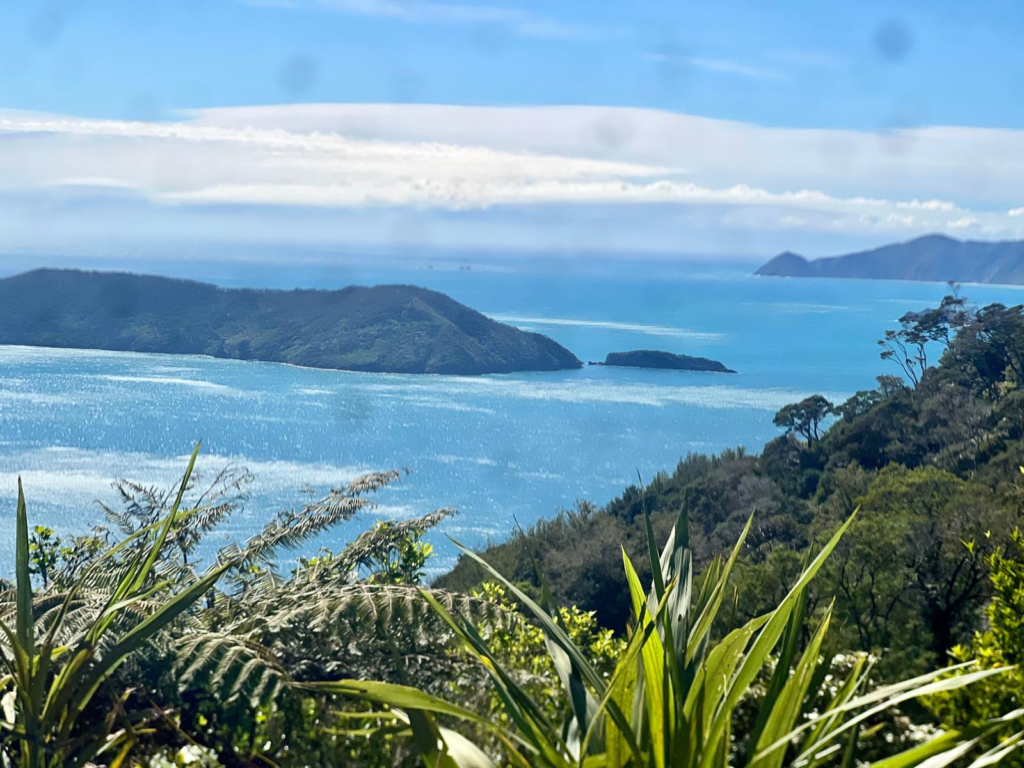
On day 2 we went up to Eatwell’s lookout which is a must do!! Eatwell’s lookout has the best view of the Sounds and is the iconic photo you see when you google the Queen Charlotte Track. I wish someone would have told me it isn’t on the direct path and you have to go off on a 1km side trail to see it! Don’t miss it!
Lodging and Camping on the Queen Charlotte Track
Something that was a little confusing when booking the track is the fact that there is a mix of private campgrounds, public (DOC) campgrounds and lodges.
Here are the 3 campgrounds we stayed at along the track:
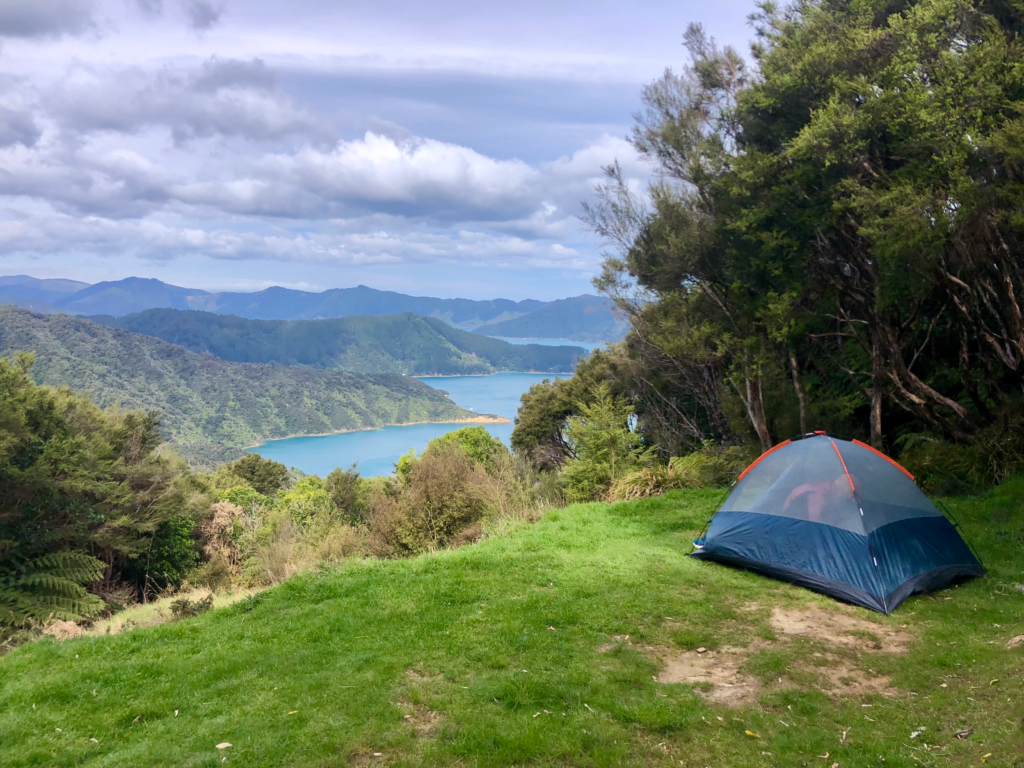
Night 1: Endeavor Inlet: Queen Charlotte Eco-Camp (Miners Camp)
This is a private campground and wasn’t listed on the Department of Conservation website (DOC). They also have yurts to stay in! We got to use their little kitchen and they even lent us their fishing rods and snorkel gear! All in all there were about a half dozen accommodation options within Endeavor Inlet, we really loved the co-camp!
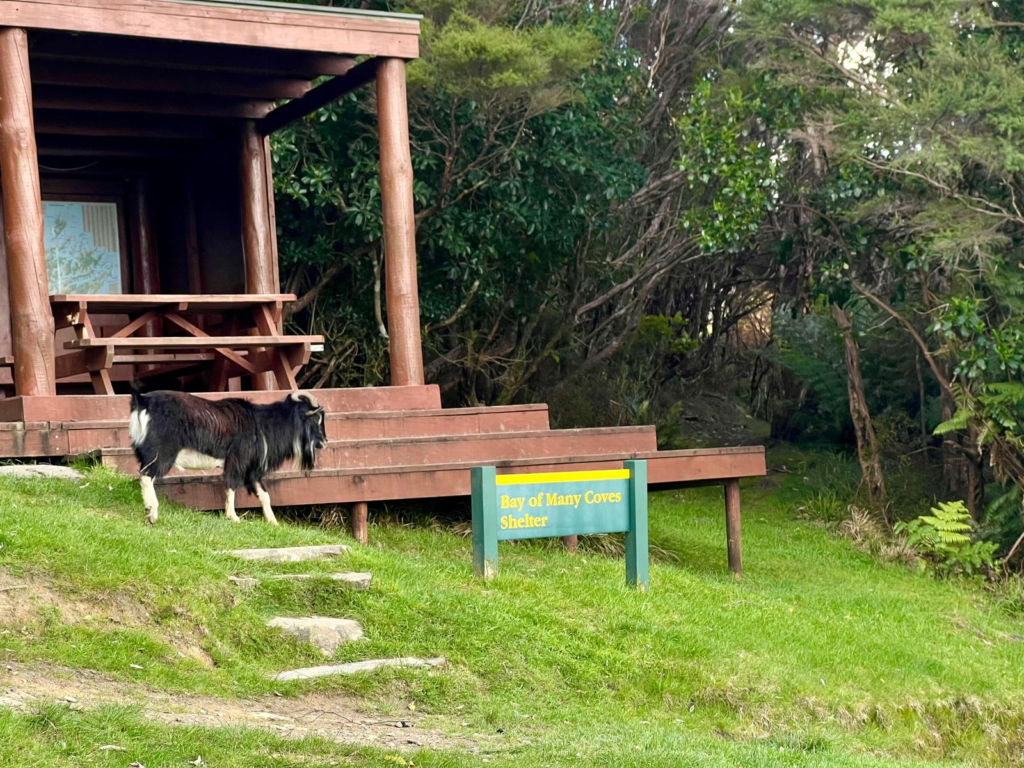
Night 2: Bay of Many Coves: Bay of Many Coves DOC campsite
This was a DOC campground that had a basic shelter with picnic table and about 15 tent sites.
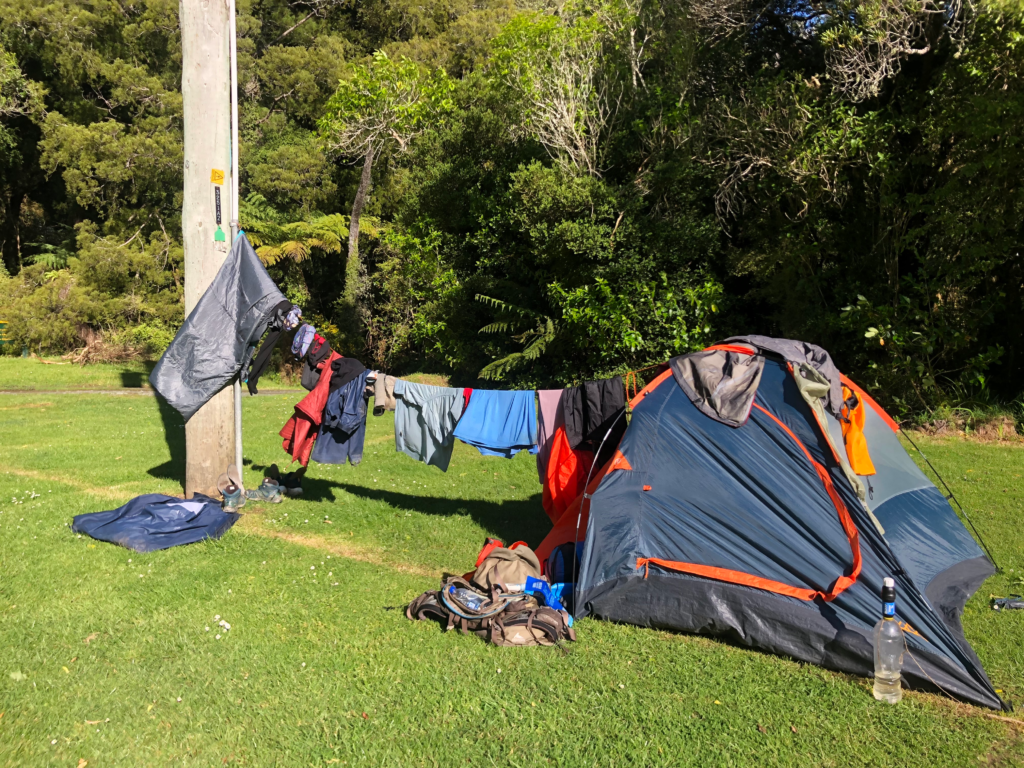
Night 3: Ta Mahia Saddle: Mistletoe Bay Campground
Another private campground and this one even had a little store, gear drying room, big kitchen, laundry and showers (for $2)! We camped here but they did have cabins and bunk rooms as well.
The other campgrounds we considered staying at were camp bay and cowshed. The most popular lodges seemed to be Furneaux Lodge, Punga Cove Resort, Portage Hotel and Lochmara Lodge.
How to Plan for the Queen Charlotte Track
Here’s how you should plan your Queen Charlotte Track adventure! There are several things to book so I’ve made it easy and but it all in a list for you here
Book Accommodation
Choose your dates and book your campgrounds or lodges in advance! Make sure you book everything for the correct direction you are hiking.
We booked our DOC campgrounds on the government booking website. The private campgrounds we stayed at can be found at “Eco-Camp” and “Mistletoe Bay.”
Book Transportation
Next, book your roundtrip watertaxi with Beachcomber Cruises or a similar service.
Private Land Fee
But wait! There’s more! The QCT goes through private land, thus the Queen Charlotte Track Land Cooperative collects a fee to help maintain the beautiful trail. It’s $20 for a day pass or $50 for 5 days. While you won’t technically need it for your first day on the trail, you’ll need it for the rest of the hike so it’s best to just buy the 5 day pass. Purchase at the QCTLC website.
Those are the 3 major things you’ll need to plan for and book in advance. You’ll of course need to sort your gear ….
Pre Trip Checklist
I’ve gone on enough backpacking trips here in New Zealand to have my pre-trip prep locked down!
This isn’t a full list of things to pack but rather a to-do list before the hike and loose packing guidelines
- Dates picked out
- Lodge/campsites booked
- Accommodation for before/after
- Transportation sorted
- Food packed (see food inspiration in the next section!)
- Some sort of map
- Personal equipment:
- Comfortable hiking shoes
- Sleeping bag / pillow / tent
- Hiking outfit / sleeping outfit
- A GOOD pair of hiking socks (truly essential!)
- MEDICAL KIT (including moleskin for blisters)
- Sun protection – hat, sunscreen, sunglasses
- Rain gear
- Cookwear
- Water purification method (I use a hydrapak filter)
- Intentions registered
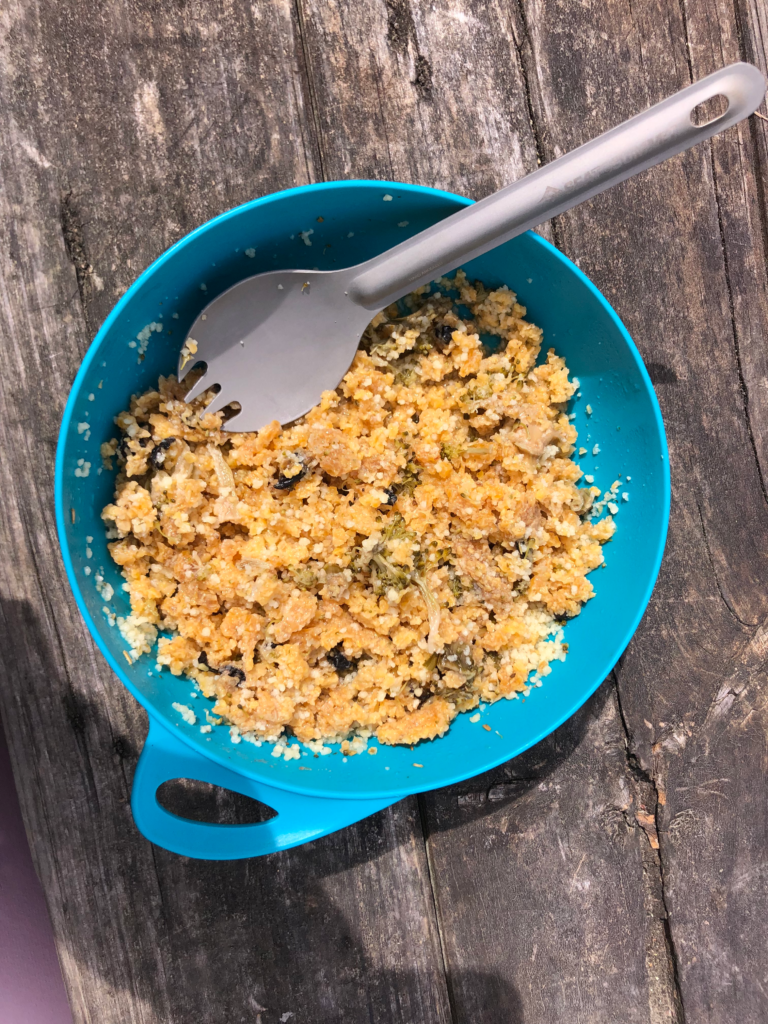
Backpacking Food Inspiration
I’ve become a bit of a nerd when it comes to prepping backpacking meals. Since moving to New Zealand I’ve done about 1 backpacking trip a month! So to save on backpacking meals my partner and I bought a cheap food dehydrator. Even if you don’t have a dehydrator you can use the oven!
While I’ll admit this isn’t ideal for anyone just traveling through NZ, it’s a great option if you have access to an oven.
Here’s what I ate as a vegetarian on the 4 day trek. If you’re looking for even more backpacking food ideas, check out my post “10 Cold Soaked Lunch Ideas.”
| Breakfast | Lunch | Dinner | Snacks |
| at home | Ramen + Tuna | Chickpea Bolognese | OSM bar, nuts |
| Potato Hash | Mexi Bean & Rice Burritos | Chilli Mac n Cheese | OSM bar, dried kiwis, chips |
| Cinnamon Apple Oats | Dal Tadka | Chickpea Bolognese | OSM bar, gummy worms, nuts |
| Cinnamon Apple Oats | Polenta | at home | OSM bar, nuts, chips |
Some of the meals I made at home and dehydrated were old reliables like my chickpea bolognese and the bean burritos. I like to cook a hearty meal at home, dehydrate it to make it shelf stable and save on the water weight, and then it’s easy to rehydrate on the trail!
For the QCT I tried a few new recipes like the breakfast potato hash and polenta, which fell a little flat! So it’s a bit of an experiment every time we go out on a multi-day hike!
Cost to do the Queen Charlotte Track
So how much did our 4 magical days on the QCT cost us? Here’s the total cost breakdown!
Campsites
$44 NZD per person
$50 NZD private land fee
Transportation
$129 NZD beachcomber cruises watertaxi
$24 NZD parking pass for car
Food
$35 NZD
Safety
Registering our intentions: free
All in all it cost me $282 NZD / $162 USD to hike the Queen Charlotte Track!
What it’s Like Hiking the Queen Charlotte Track
Now that we’ve got all the logistics covered, what was it actually like to hike the QCT?
For starters we really loved this track!! We actually enjoyed it more than the Able Tasman Great Walk because we felt like the track had more variability and the views were a bit more spectacular.
This is the day by day breakdown of our time on the Queen Charlotte track.
Day 1: Ship Cove to Endeavor Inlet – 12 miles
We had a beautiful sunny start to our day when we boarded the boat at 9am! It was a lovely 1 hour ride out to Ship Cove and we even saw dolphins the the way!
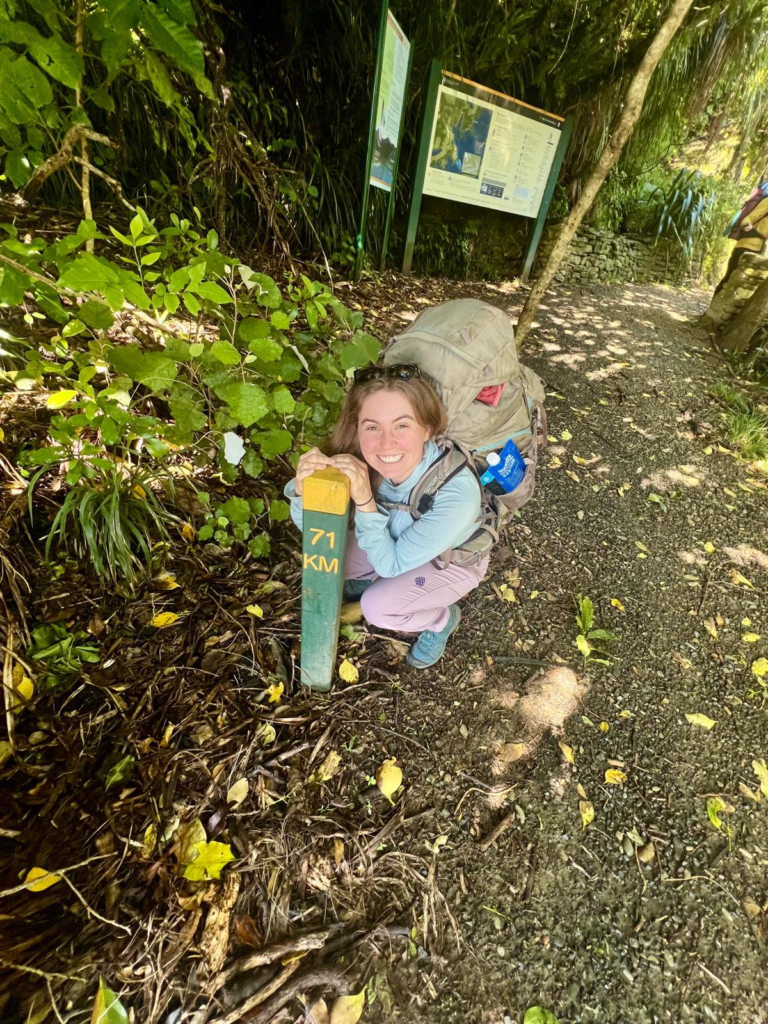
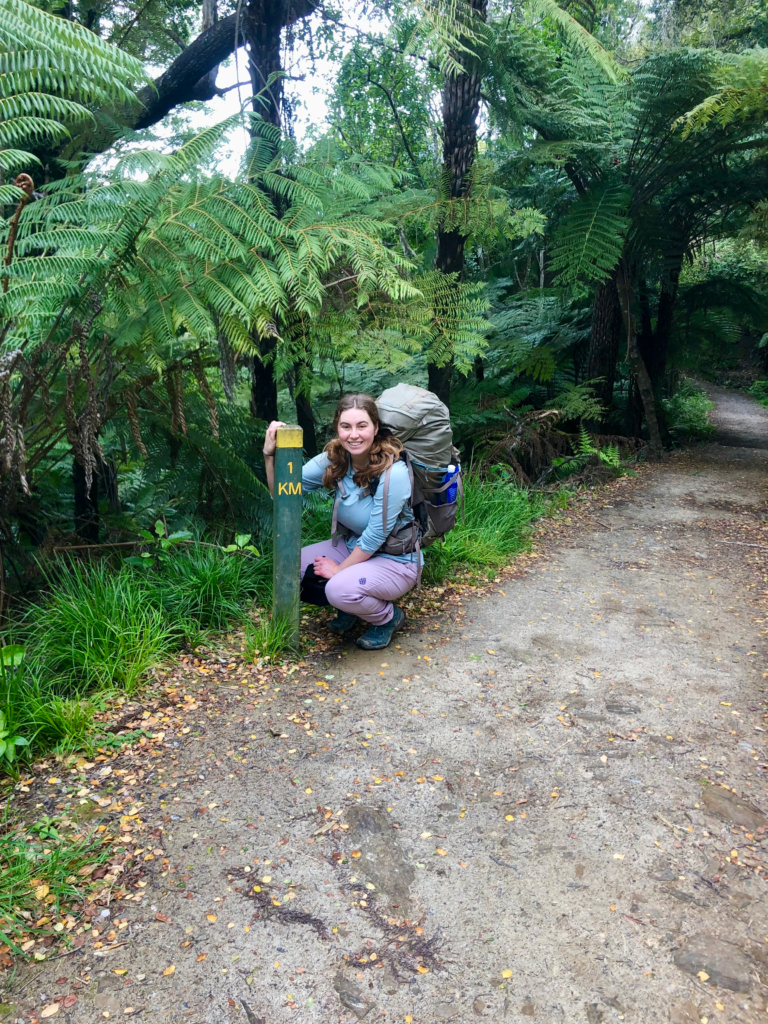
After disembarking we had a little snack break before we even started walking! I posed with the “71km” sign (which is confusing because the trail is 72km) and we were off!
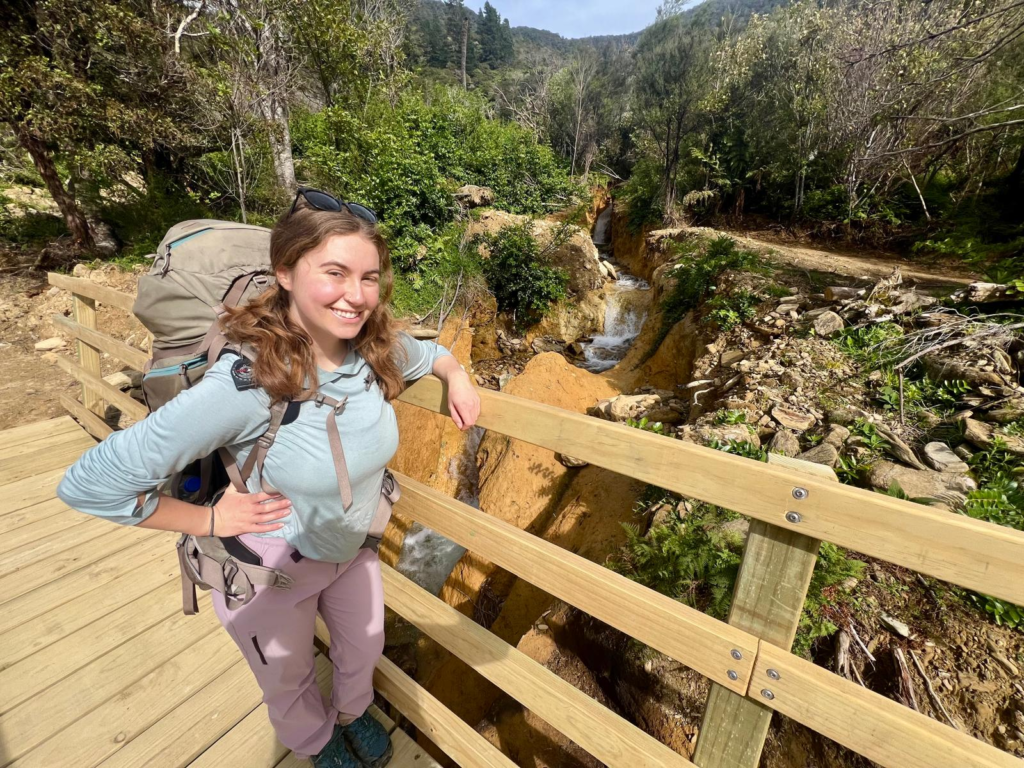
The terrain on day 1 was great! The track was well maintained and offered beautiful views of the beaches and coves we passed by. I was in awe of how clear and sparkly the water was! In terms of difficulty I would give day 1 a 3/10.
The track undulated, so sometimes we’d be going up, sometimes we’d be going down! The last mile or so was relatively flat which was nice to end on!
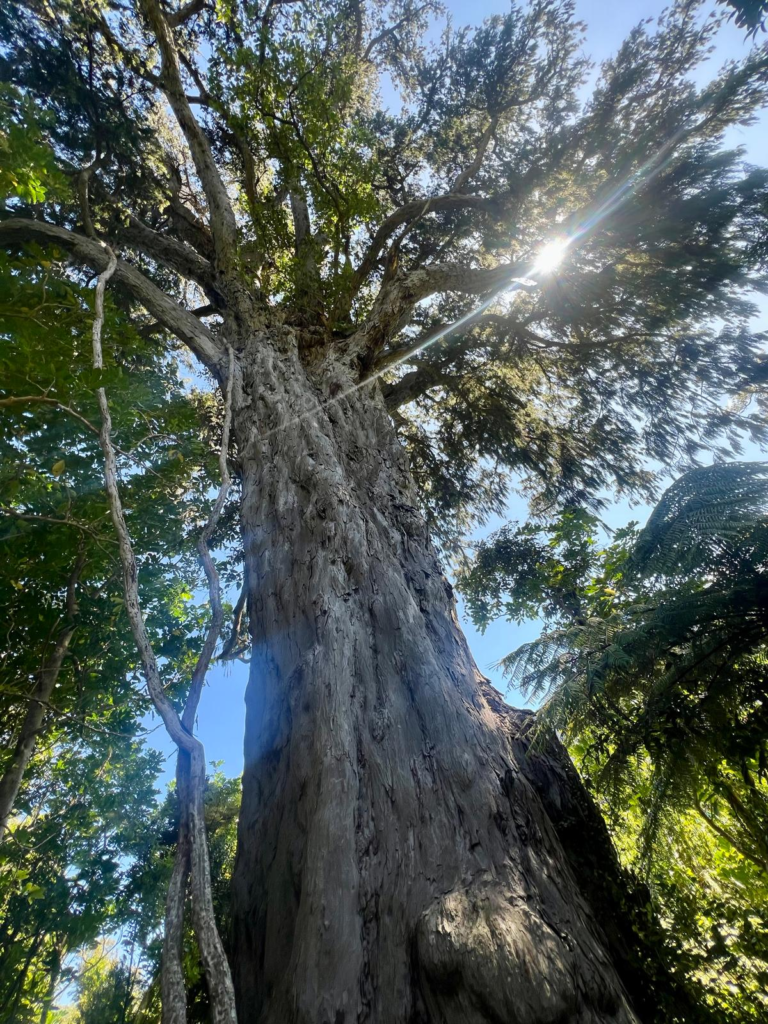
Make sure you do the side trail up to the old Rimu tree! At 1,000 years old, this rimu tree is estimated to be one of the old living things in New Zealand!
The best part about day 1 was that we were the only people staying at the Eco-Camp, so we got upgraded to a yurt! This was such a kind gesture by the manager and it totally made our day! The yurt was clean, comfortable and warm!
Nate even got to use the camps fishing pole while I went for a dip in the sea! What an incredible first day!
Day 2: Endeavor Inlet to Bay of Many Coves campground – 12 miles
Day 2 was off to a great start and was relatively flat for the first bit. Honestly the thing that surprised me the most about the QCT was that it was more uphill than I was expecting based on the elevation profile! Ha!
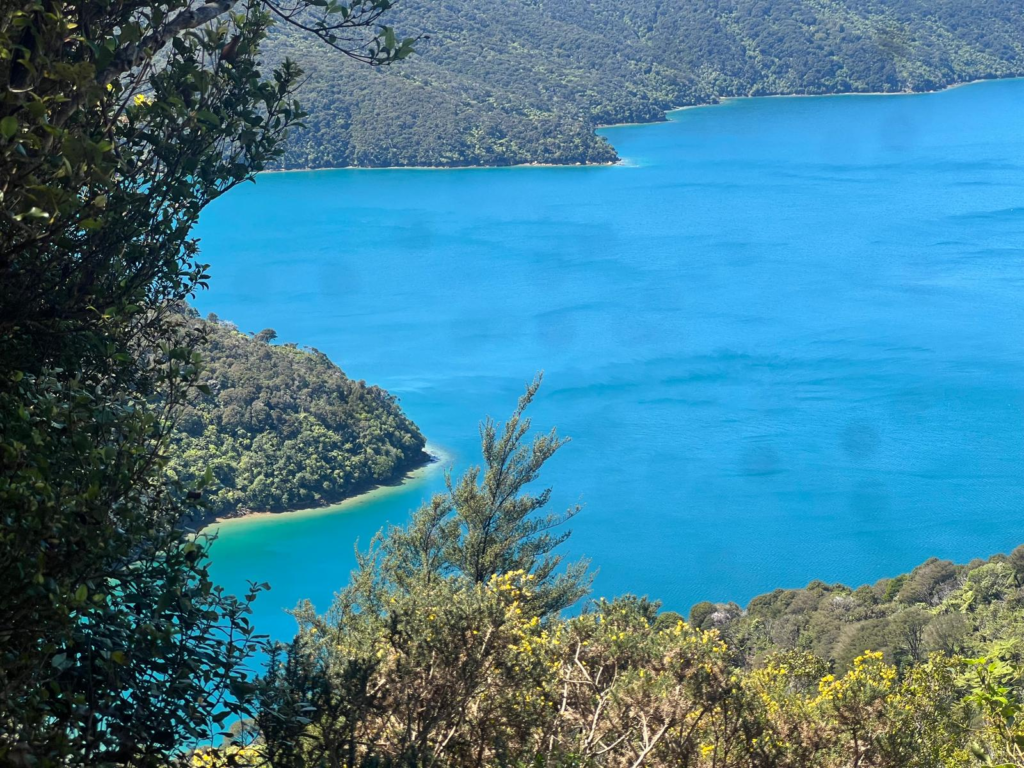
But the views continued to be amazing. I was always happy at the end of a long uphill because it meant we had a beautiful view of the Marlborough sound!
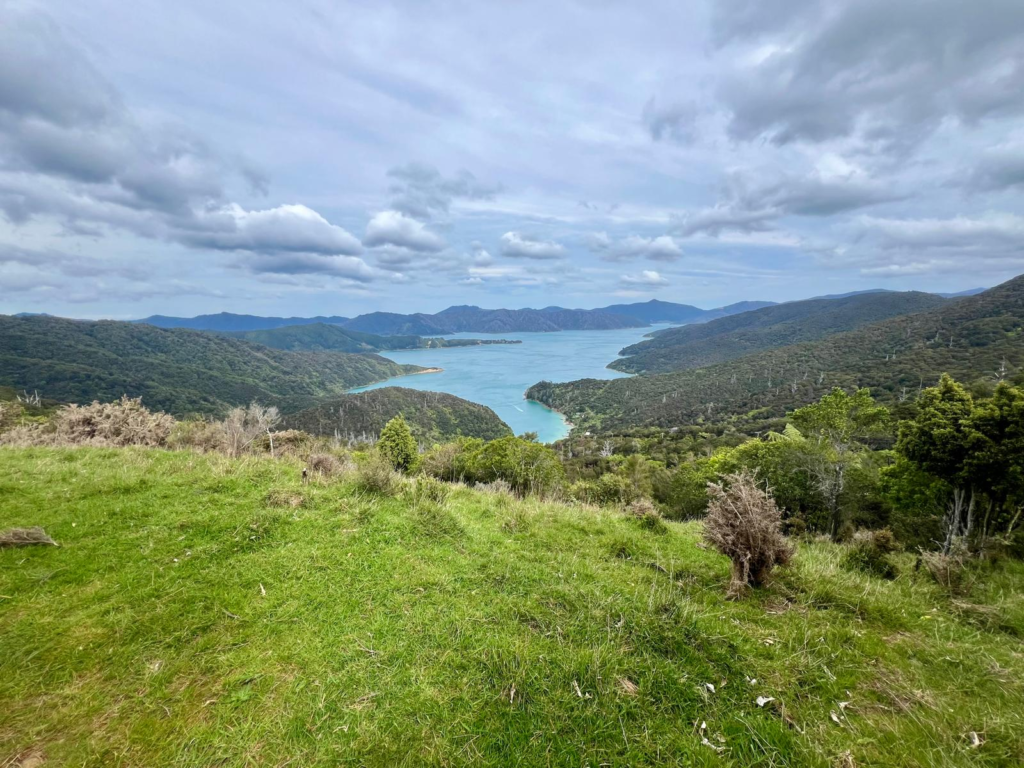
After a particularly long uphill we finally crested the top and I was so over it. There was a turn off for “Eatwell Lookout” which had a time estimate of 30 minute return. “No thanks!” I said.
Thankfully Nate really wanted to go check it out and I couldn’t just wait at the bottom all grumpy so I trudged up the side trail with him. I had a sneaking suspicion this was the famous lookout shown in the track advertisements.
And I was right!
Eatwells Lookout is a must visit! It’s the best panoramic view on the track and it really only takes 10 minutes uphill to reach. Don’t miss out!
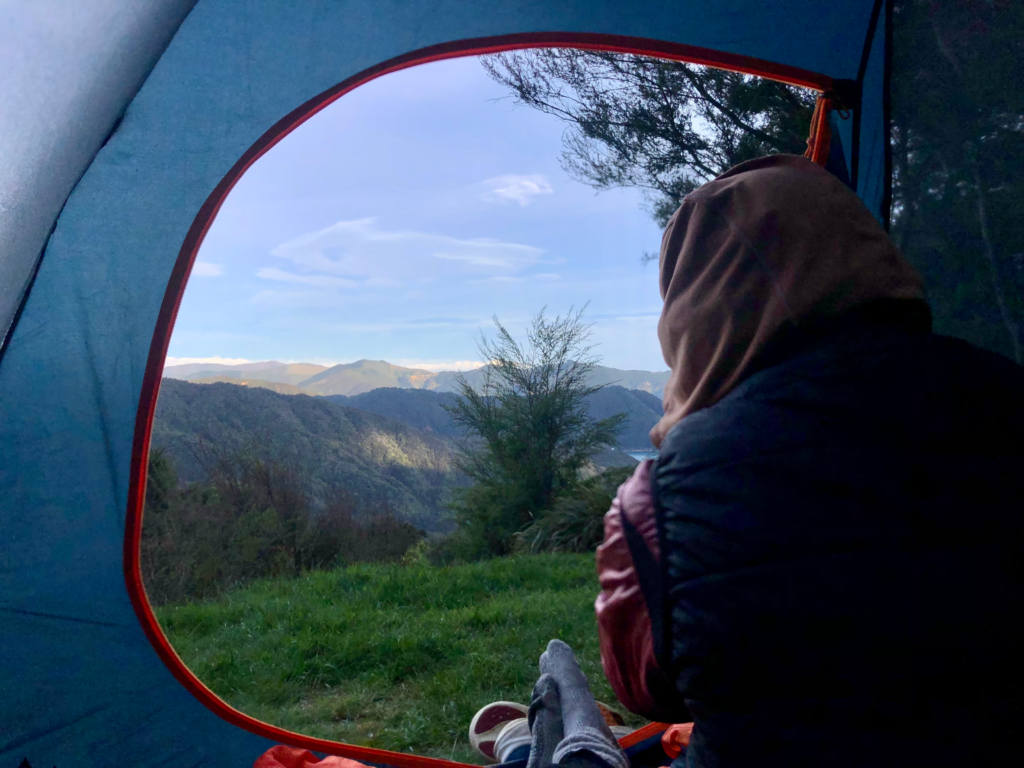
The Bay of Many Coves campsite felt very randomly placed on the side of the hill, but it had a bathroom, water and a sheltered picnic table so we were happy. Plus we were the only ones there so we got the best tent site!
Oh, and there were goats!!
Day 3: Bay of Many Coves Campsite to Mistletoe Bay – 18 miles
We woke up to howling winds and pouring rains. Why oh why would I plan an 18 mile day?
Well I didn’t plan an 18 mile day. I only planned a 10 mile day. Originally we were gonna stay at Cowshed Campground in Portage Bay. But when we reached Cowshed it was only 1pm and the campground was on the windward side of the hill.
So we decided to push through the rain and make it to Te Mahia saddle which was about an other 6 miles away.

Little did I know the next bit of the track was the steepest incline! The steep uphill combined with the rain and sweating in our rain gear made for a less then pleasant next 45 minutes. But once you make it up the hill it really is all downhill from there!
When we reached Te Mahia saddle we were so elated! The sun even came out! We then had another little bit down from the saddle and into Mistletoe Bay campground. Somehow we ended up doing around 18 miles that day according to our phones! Our total elevation gain was 2750 ft! I give this a 7/10 for difficulty!
We set out all our things to dry in the sun and took full advantage of the nice kitchen at the campground.
Day 4: Mistletoe Bay to Anakiwa – 7 miles
The last day! Hurrah!
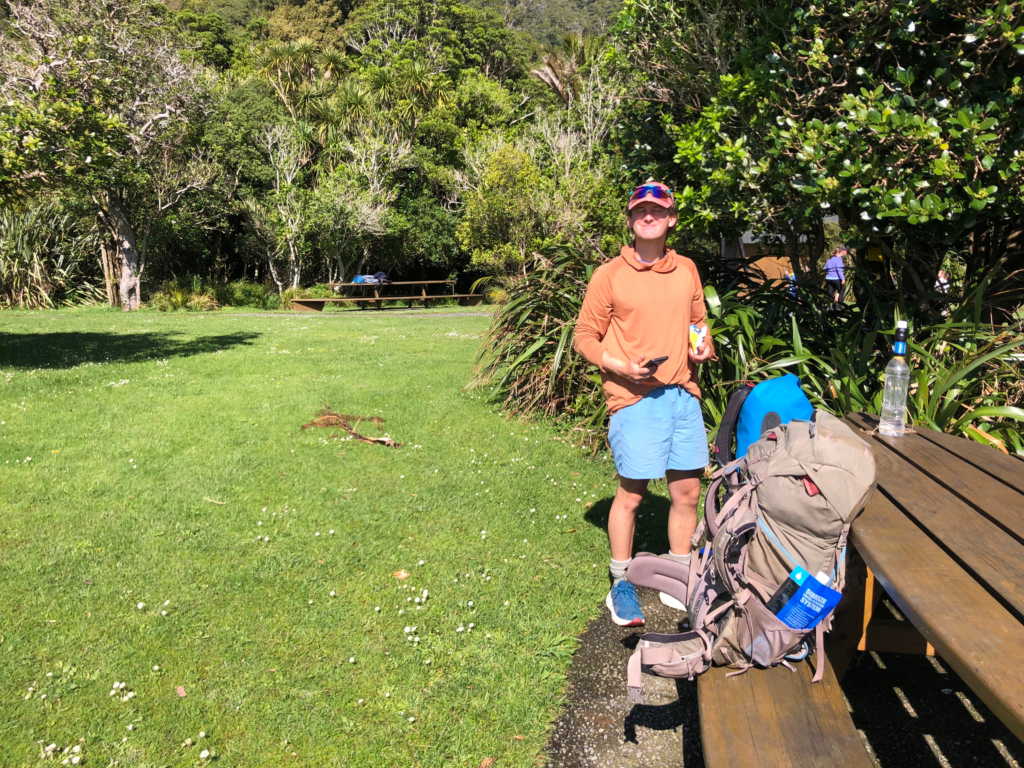
We were said to get off the trail but also excited at the idea of finishing and having that accomplishment! We set off nice and early in the hopes that the water taxi could get us early.
Within the first hour my feet really started to hurt and I was ready to take my shoes off. We made it to Anakiwa in exactly 3 hours. This is the most modest part of the track and while it’s certainly not flat it was nothing like the previous days climb.
When we got to Anakiwa I took off my shoes and my more toes were so swollen and tender! I think my shoes got too stiff when I left them near the heater overnight at the campground. It was honestly the worst my feet have felt in a long time!
But regardless of my foot drama, we did it! I would absolutely recommend the Queen Charlotte track to anyone looking for a way to truly experience beauty of the Marlborough Sounds.
I hope this guide to the Queen Charlotte track hike has been helpful in planning your adventure!
Happy tramping!
Ahoy! I’m Bree and I’ve started this blog to help you plan your next great outdoor adventure. With a background in marine science, I’ve got an aptitude for all things ocean, but you’ll find land based adventures here too! Everything you see here is based on my own travel experience and paid for myself. I hope you stick around!